En (UK)
  De
De zh-CN
zh-CN Se
Se En (US)
 Nl
Nl Fr
Fr
Artefacts or Representative Microstructure?
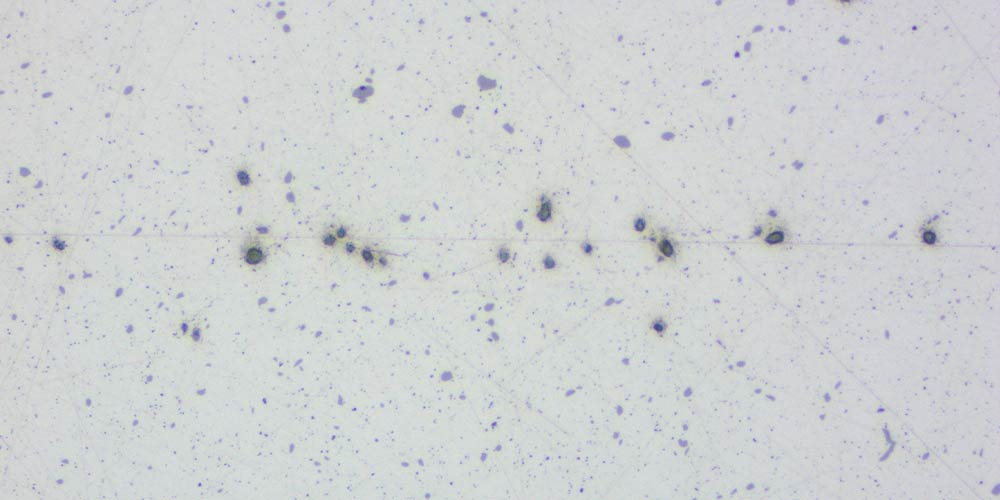
The occurrence of black spots on a polished surface is often a cause of concern and discussion: are they pores (holes) or inclusions, i.e. representative of the material being examined, or are they artefacts resulting from the preparation or insufficient cleaning?
This guide helps to identify, prevent, and eliminate preparation defects looking like black spots in metallographic sample preparation. The purpose of the guide is to look at the different causes for the black spots and to show how to distinguish between a “real” feature and a preparation artefact. This distinction is important for accurate material characterisation and quality control.
1. Structural Black Spots That May Resemble Artefacts
Not all black spots are preparation errors. In many cases, they reflect the native state of the material. Depending on the manufacturing process, you can expect different characteristics:
- Casting and additive manufacturing (AM): Often contain natural pores, casting voids, or shrinkage defects.
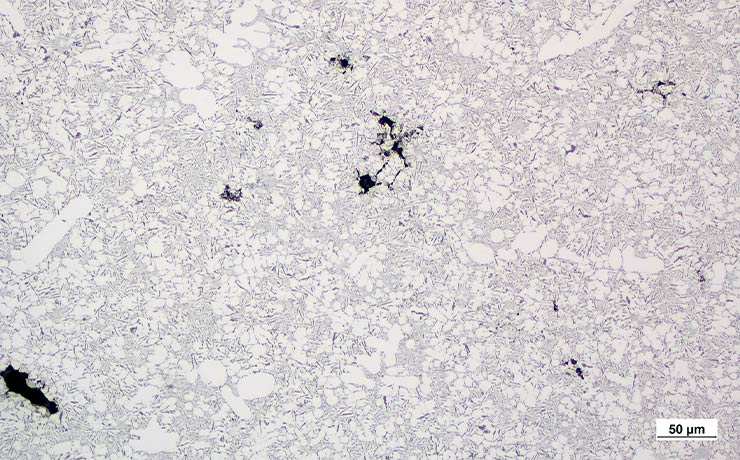
- Powder metallurgy: Frequently exhibits residual porosity as part of the density profile.
- Steel: Non-metallic inclusions, such as grey sulfides or black oxides and silicates of manganese, silicon, aluminium, or iron, belong to the native microstructure.
- Non-ferrous alloys: Native spots like cuprous oxides in copper (often appearing dark blue-grey), lead globules in brass, or alumina clusters in aluminium can appear as dark (or even black depending on the magnification used).
These represent just a few examples of how secondary phases or inclusions can manifest as black spots in various alloys.
2. Microscopic Verification: Identifying Artefacts vs. Real Features
Before adjusting your preparation parameters, use your optical microscope to determine the true nature of the black spot.
At low magnifications (50x–100x), the high depth of field can cause surface, elevated, and depth features to all look deceptively flat and in focus at once; here it is likely you see them as black spots. When you change to 200x–500x magnification, the depth of field becomes very shallow, allowing you to use fine-focus adjustments to identify where the feature actually sits relative to the metal matrix:
- Inclusions (flat features): If both the matrix surface and the spot are in sharp focus at the exact same time, it is a flat feature. This indicates you are looking at an inclusion.
- Embedded abrasives (surface features): Because these particles are forced into the metal, they sit at the immediate surface plane. Under high optical magnification , they typically appear as small, dark spots or irregular fragments. Because they can protrude slightly above the polished surface, they require fine-focus adjustment to see their edges clearly.
- Holes/pull-outs (depth features): Because light scatters inside a cavity, these features typically remain dark or pitch-black. If you must distinctly adjust the fine focus downward into the spot to see its base, it is a depth feature. This focal movement proves the spot is actually a void, pore, or pull-out.
- Dirt and contamination (elevated and surface features):
- Loose debris (elevated): Dust and lint sit above the metal surface, appearing blurry when the metal matrix is sharply focused. Turning the fine focus upward brings them into focus.
- Dried films and stains (surface): Water spots or dried lubricant sit directly on the surface. They are in focus at the same focal plane as the metal matrix, but appear as hazy, translucent, or irregular patches.
If a spot disappears or changes location after re-cleaning, it is surface contamination. Once a black spot is identified as a preparation artefact (i.e. embedded abrasives or pull-outs), inspect the sample under a microscope after every individual preparation step to isolate where it first appeared. Only change one parameter at a time.
3. Preparation-Related Artefacts
During semi-automatic/automatic preparation, parameters like force, rotational speed, surface choice and dosing apply uniformly across the sample holder. Because these global settings affect the whole specimen, preparation-induced “black spots”, such as pull-outs, embedded abrasives or drying residue, often appear across the entire specimen surface rather than in isolated areas.
Artefacts that create black spots:
- Pull-outs: A preparation artefact where particles are physically removed from the surface of a specimen during grinding and/or polishing.

To understand the underlying factors and prevention strategies more in depth, read how to prevent pull-outs.
- Embedded abrasives: Occurs when abrasive particles get pressed into the sample surface.
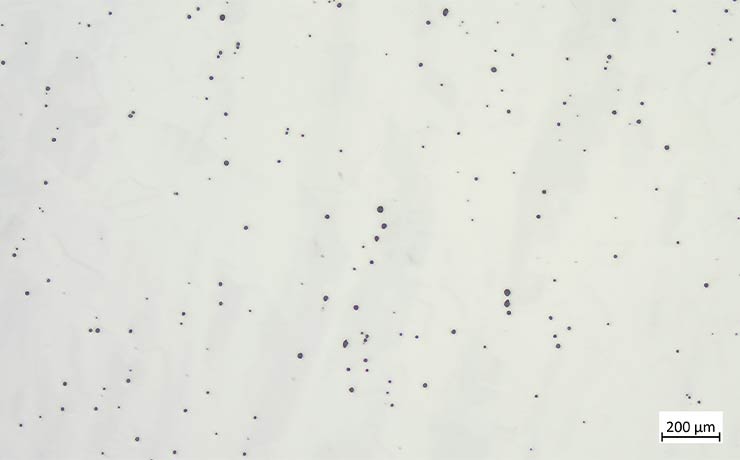
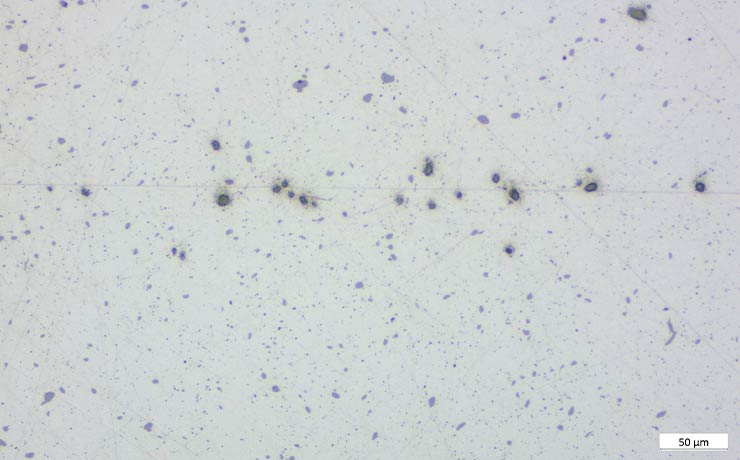
To gain a clearer perspective on the factors behind embedded abrasives, read how to eliminate embedded abrasives.
- Insufficient cleaning: Dark spots and contamination lines caused by debris left behind between preparation steps.
- Deformation: During plane grinding, severe grinding can create structural damage. These are unremoved deformation layers that stay as black spots if the fine grinding step was too short, see Figure 5.

Artefacts/mechanisms that alter the appearance of the black spots:
- Edge rounding: If polishing is performed too long on a soft cloth, the pores get edge rounding and will appear larger than they are.
- Smearing: Smearing occurs when a softer metal is pushed instead of cut during grinding and polishing. For example, if metal is pushed over a pore, it can affect the true number of visible black spots.
4. Optimise the Dosing
Prevent preparation artefacts by optimising your dosing levels. Ensuring the correct suspension dosing is critical for effective material removal:
- Avoid excessive dosing: A polishing cloth that is too wet will cause aquaplaning. This reduces the material removal rate and unnecessarily prolongs polishing times.
- Avoid insufficient dosing: If the cloth is too dry (squeaking sound), excessive friction will cause the samples to overheat.
Both extremes compromise sample quality and introduce unwanted preparation artefacts.
5. Contamination and Cleaning Issues
Black spots can also result from contaminants introduced during preparation. Be aware if there is an unexpectedly high amount of “inclusions” during the microscopic investigation, some of it may simply be dirt.
Inadequate cleaning between steps creates dark areas, while improper lubricant or suspension use (too much or too little) leads to uneven polishing and artefact formation. It is usually possible to clean contaminated surfaces.
Solution and techniques:
- Proper cleaning between steps: Clean samples thoroughly in between the preparation steps using neutral soap, water, and ethanol (IPA for easy drying).
- Ultrasonic cleaning: Use ultrasonic cleaning if there are gaps (but be sure that inclusions are not removed in the process).
- Flush the cloth during the last 3-5 seconds: If cleaning is difficult, make the samples easier to clean by lowering the force or increasing the lubricant flow at the end of the step, if working with separate bottles for diamond suspension and lubricant. For 2-in-1 diamond suspensions, lowering the preparation force during these final seconds keeps the surface wet and easy to clean.
- Extra cleaning after the final step if needed: After the final step, clean the sample on a Mag-Napal (high-nap) cloth using a small amount of alcohol; the cloth should be moist, not wet.
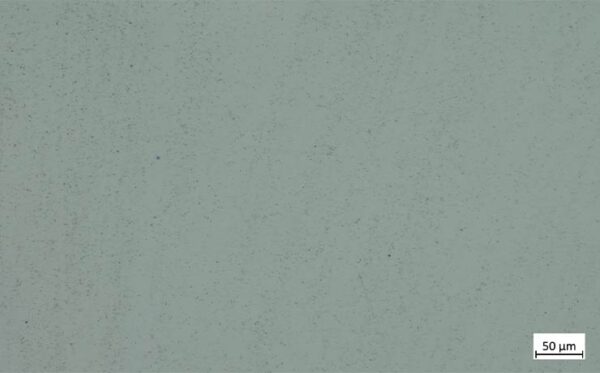

Storage: Store grinding discs and polishing cloths in a dust-free environment to prevent foreign matter from contaminating the surfaces.
6. Achieving an Artefact-Free Polished Sample Surface
While black spots originating from the manufacturing process represent the true, native microstructure of the material and must be preserved, preparation-related artefacts and contamination must be eliminated. To ensure your final polished surface is strictly representative and entirely free of preparation-induced black spots, it is essential to optimise each step of the process:
- Optimise grinding and polishing parameters: Use the right abrasives, force, and level of diamond suspension and lubricant to minimise preparation artefacts.
- Implement effective cleaning procedures: Clean samples thoroughly to prevent contamination.
- Choose the right consumables: Use appropriate diamond suspensions and lubricants that fit your specific material type and hardness.
Technical Vocabulary
- Artefacts: Preparation errors. Features on the sample surface that are not part of the real microstructure, but were created by the preparation process.
- Depth feature: A feature that exists below the plane of the metal surface, such as a hole or pull-outs.
- Elevated feature: A feature sitting above the plane of the metal surface, such as loose dust or debris.
- Embedded abrasives: Abrasive particles (diamonds, silicon carbide or aluminium oxide etc.) that have been pushed into the metal surface rather than cutting through it.
- Inclusions: Particles of a different material or phase, such as carbides or oxides, that are trapped within the metal.
- Nap: The long fibers sticking out from the surface of a polishing cloth.
- Plane grinding: Remove all damage from the cutting and make the sample plane.
- Pull-outs: An artefact where hard or brittle particles are plucked or ripped out of the metal, leaving a hole behind.
- Suspension: A liquid containing abrasive particles (like diamonds).
- 2-in-1 suspension: Is a ready-mixed solution that combines diamond suspension and lubricant in a single liquid.